> ## Documentation Index
> Fetch the complete documentation index at: https://docs.dialect.to/llms.txt
> Use this file to discover all available pages before exploring further.
# Quick Start
> Get your first notification working in under 15 minutes. Complete flow from dashboard registration to sending your first notification.
## Prerequisites
**Before you start, make sure you have:**
* **Solana Wallet**: Any Solana wallet (Phantom, Solflare, etc.)
* **Development Environment**: Node.js 16+ installed
* **Basic Knowledge**: React components and wallet connections
## Video Tutorial
Watch the complete walkthrough to see exactly how it works.
### Chapters
* [00:00](https://youtu.be/aPLaXqEkzJY?t=0) Send your first alert in 15 minutes
* [00:25](https://youtu.be/aPLaXqEkzJY?t=25) Prerequisites
* [03:13](https://youtu.be/aPLaXqEkzJY?t=193) Register your app
* [05:37](https://youtu.be/aPLaXqEkzJY?t=337) Setup a clean project
* [07:36](https://youtu.be/aPLaXqEkzJY?t=456) Implementation
* [13:38](https://youtu.be/aPLaXqEkzJY?t=818) Signup for messages
* [14:55](https://youtu.be/aPLaXqEkzJY?t=895) Send message to a wallet
## What You'll Build
By the end of this tutorial, you'll have:
* ✅ A working notification bell in your React app
* ✅ Users can subscribe to receive notifications
* ✅ Dashboard to compose and send notifications
* ✅ Your first notification successfully delivered
**Time Required**: \~15 minutes
## Step 1: Register Your App (3 minutes)
### Create a New Wallet
Create a dedicated wallet for your app registration. This keeps your app's identity separate from your personal wallet and provides better security.
**In your Solana wallet app:**
1. **Create a new wallet** (most wallet apps have an "Add Wallet" or "+" option)
2. **Name it** something like "My App Notifications"
3. **Copy the wallet address** - you'll need this for registration
### Connect and Register
1. **Visit**: [https://dashboard.dialect.to/](https://dashboard.dialect.to)
2. **Click**: "Alerts" in the left sidebar
3. **Click**: "Guide" tab (don't get confused by "Compose")
4. **Connect**: Your **new** wallet (not your main wallet)
5. **Sign**: The message to authenticate
### Complete Registration
Fill out your app information:
* **Project Logo**: Upload your app's logo
* **Project Name**: Your application name
* **Description**: Brief description of your app
Click **"Register"** and wait for the ✅ confirmation.
### Save Your App Address
**Important**: Copy your app address from the bottom-left corner (click "Copy Address"). This should match the public key of the wallet you just created.
```bash theme={null}
# This is your app's public key - save it!
dappAddress=5XCdQVqopjAoVkNhkXWHmeHNhRS5bPiATUULy8FHDySX
```
**Note**: This address will be used to initialize the Dialect SDK in your React component (Step 3).
## Step 2: Set Up Your Project (3 minutes)
If you already have an existing React/Next.js project, you can skip this step and jump directly to [Step 3: Add Notification Bell](#step-3-add-notification-bell-4-minutes). The notification bell works with any React application.
### Clone the Scaffold
We'll start with a fresh project using the Solana app scaffold:
```bash theme={null}
# Create a new Solana dApp scaffold
npx create-solana-dapp@latest alerts-tutorial
# Choose your options when prompted:
# - Framework: Next.js (A React framework by Vercel)
# - Template: gill-next-tailwind (Next.js, Tailwind, gill based on @solana/kit, Wallet UI)
# Navigate to the project
cd alerts-tutorial
# Start development server
npm run dev
```
Open [http://localhost:3000](http://localhost:3000) to verify your scaffold is running correctly.
## Step 3: Add Notification Bell (4 minutes)
### Install Dialect Packages
```bash theme={null}
npm install @dialectlabs/react-ui @dialectlabs/react-sdk-blockchain-solana
```
```bash theme={null}
yarn add @dialectlabs/react-ui @dialectlabs/react-sdk-blockchain-solana
```
### Create Notification Component
Create a new file `src/components/DialectNotificationComponent.tsx`:
```tsx title="src/components/DialectNotificationComponent.tsx" theme={null}
"use client";
import "@dialectlabs/react-ui/index.css";
import { DialectSolanaSdk } from "@dialectlabs/react-sdk-blockchain-solana";
import { NotificationsButton } from "@dialectlabs/react-ui";
// Replace with your actual app address from Step 1
const dappAddress = "5XCdQVqopjAoVkNhkXWHmeHNhRS5bPiATUULy8FHDySX";
export const DialectNotificationComponent = () => {
return (
);
};
```
### Add to Your App Header
Add the notification bell to your app's header next to the wallet button.
Find the header file `src/components/app-header.tsx` and add the notification component:
```tsx title="src/components/app-header.tsx" theme={null}
// Add this import at the top with the other imports
import { DialectNotificationComponent } from "@/components/DialectNotificationComponent";
// Find the section with the wallet and other buttons, then add the component:
```
### Test the Component
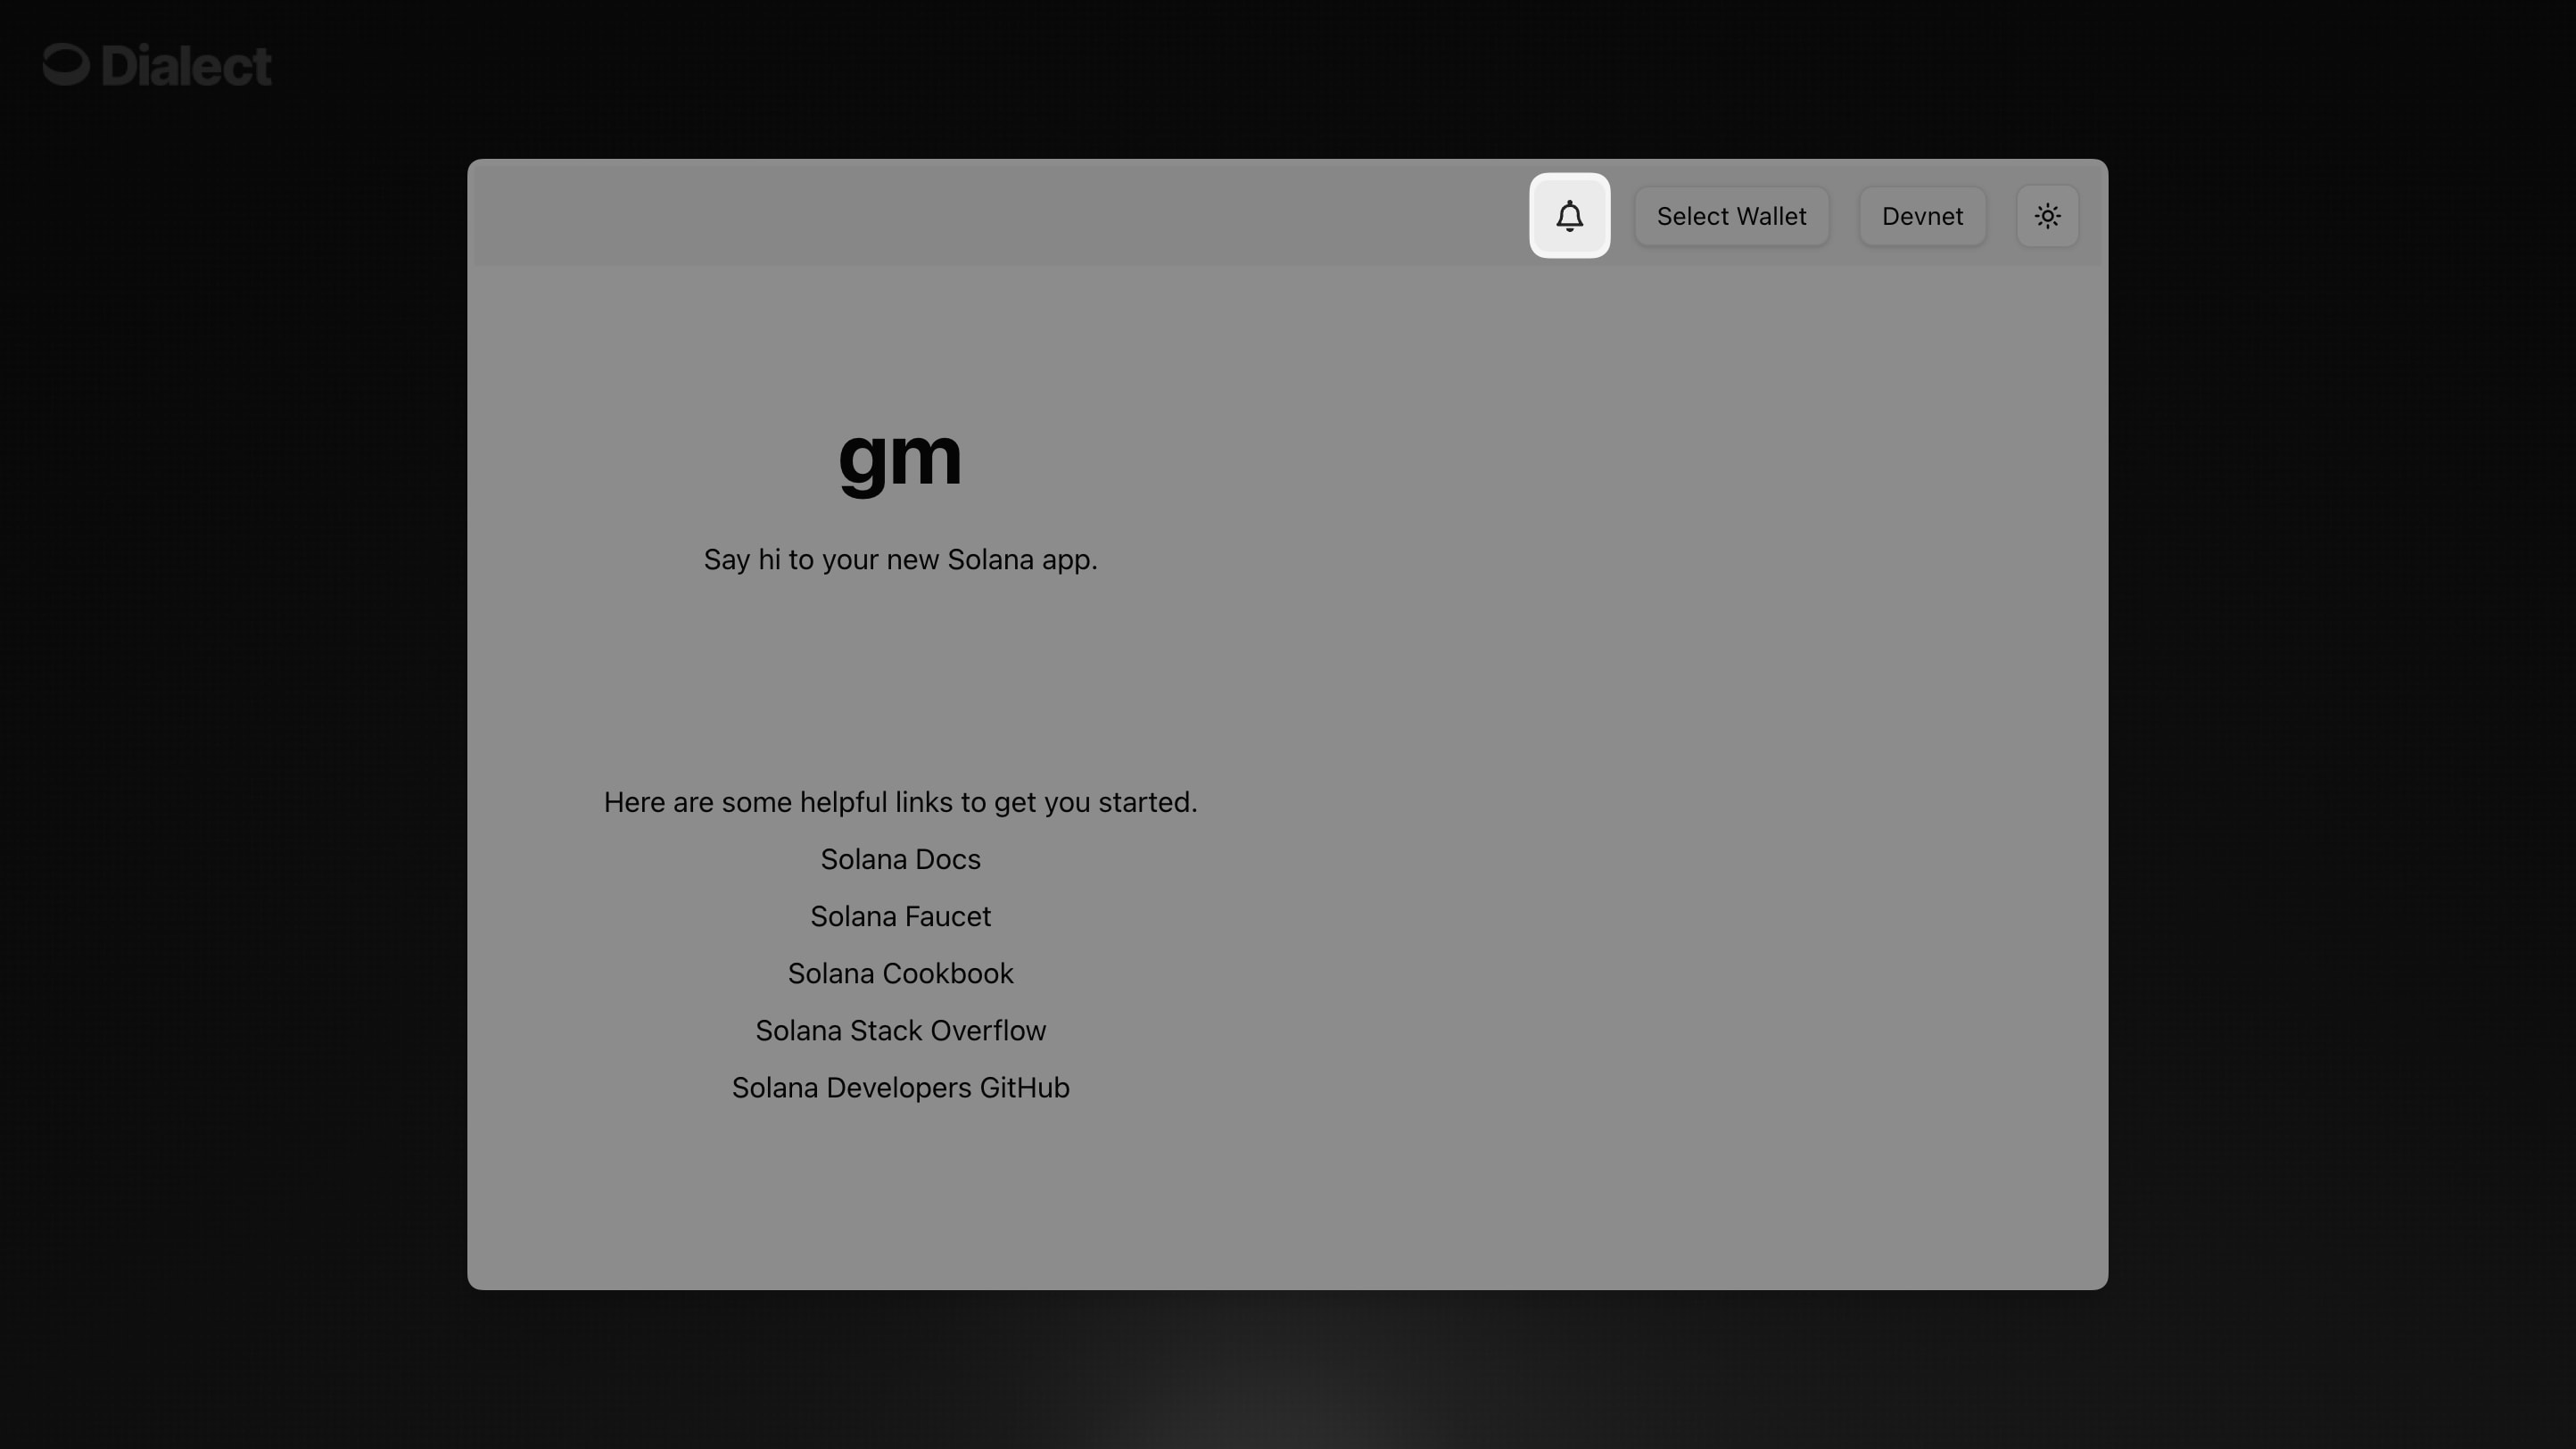
Refresh your browser and you should see the notification bell next to your wallet button and cluster selector in the top navigation.
## Step 4: User Subscribes to Notifications (2 minutes)
In the next step, your users need to opt-in into notifications:
### Subscribe Process
1. **Connect Wallet**: User connects their wallet to your app
2. **Click Bell**: User clicks the notification bell
3. **Set Up Notifications**: Click "Set up notifications"
4. **Enable Notifications**: Make sure the toggle is "ON" (very important!)
5. **Choose Additional Channels**:
* 📧 **Email**: User can optionally add their email
* 📱 **Telegram**: User can optionally add their Telegram handle
## Step 5: Send Your First Notification (3 minutes)
Now send a notification using the dashboard:
### Using the Dashboard
1. **Go back to**: [https://dashboard.dialect.to](https://dashboard.dialect.to)
2. **Click**: "Compose" tab
3. **You'll see**: "1 subscriber" (the user who just signed up)
4. **Write your message**:
* **Title**: "🎉 Welcome to My App!"
* **Body**: "This is your first notification from \[Your App Name]"
5. **Click**: "Send"
### Verify It Works
Go back to your app or our [Alerts Example App](https://alerts-example.dialect.to) and:
* The notification bell should show a green dot (unread notification)
* Click the bell to see your message: "Welcome to My App!"
* The message shows "This is your first notification..."
**🎉 Congratulations! You've sent your first notification!**
## Troubleshooting
### ❌ "No subscribers found"
* Make sure the user clicked the bell and enabled notifications
* **Very important**: Check that the toggle is "ON" in the notification settings (sometimes it defaults to "OFF")
### ❌ "Component not rendering"
* Ensure you imported the CSS: `import "@dialectlabs/react-ui/index.css"`
* Check that your app address is correct
* Verify wallet connection is working
### ❌ "User not receiving notifications"
* User must connect wallet and enable notifications first
* Check dashboard analytics to see delivery status
* Verify the target wallet address is correct
## Customization
Want to customize the look and feel of your notification bell? Check out our **[Event Detection and Monitoring](/alerts/alerts-and-monitoring/index)** guide where you can see how companies like Tensor have customized the notification widget to match their brand.
You'll find detailed styling options including:
* Custom colors and themes
* Component styling with CSS
* Complete customization examples
## Learn More
* **[Sending Guide](/alerts/send/index)** - Send alerts to your users either programmatic or by using or no-code Dashboard
* **[Universal Inbox Guide](/alerts/integrate-inbox/index)** - Integrate an Inbox using APIs or advanced UI components
* **[Event Detection and Monitoring](/alerts/alerts-and-monitoring/index)**: Use events to send notifications to your users
* **[API Guide](/api-reference/send-alerts/send-alert)** - Get an overview of available API endpoints
**🎉 You're all set!** You now have notifications working in your app. Your users can receive important updates directly in their wallets, and you can reach them programmatically from your backend.
 Refresh your browser and you should see the notification bell next to your wallet button and cluster selector in the top navigation.
## Step 4: User Subscribes to Notifications (2 minutes)
In the next step, your users need to opt-in into notifications:
### Subscribe Process
1. **Connect Wallet**: User connects their wallet to your app
2. **Click Bell**: User clicks the notification bell
3. **Set Up Notifications**: Click "Set up notifications"
4. **Enable Notifications**: Make sure the toggle is "ON" (very important!)
5. **Choose Additional Channels**:
* 📧 **Email**: User can optionally add their email
* 📱 **Telegram**: User can optionally add their Telegram handle
## Step 5: Send Your First Notification (3 minutes)
Now send a notification using the dashboard:
### Using the Dashboard
1. **Go back to**: [https://dashboard.dialect.to](https://dashboard.dialect.to)
2. **Click**: "Compose" tab
3. **You'll see**: "1 subscriber" (the user who just signed up)
4. **Write your message**:
* **Title**: "🎉 Welcome to My App!"
* **Body**: "This is your first notification from \[Your App Name]"
5. **Click**: "Send"
### Verify It Works
Refresh your browser and you should see the notification bell next to your wallet button and cluster selector in the top navigation.
## Step 4: User Subscribes to Notifications (2 minutes)
In the next step, your users need to opt-in into notifications:
### Subscribe Process
1. **Connect Wallet**: User connects their wallet to your app
2. **Click Bell**: User clicks the notification bell
3. **Set Up Notifications**: Click "Set up notifications"
4. **Enable Notifications**: Make sure the toggle is "ON" (very important!)
5. **Choose Additional Channels**:
* 📧 **Email**: User can optionally add their email
* 📱 **Telegram**: User can optionally add their Telegram handle
## Step 5: Send Your First Notification (3 minutes)
Now send a notification using the dashboard:
### Using the Dashboard
1. **Go back to**: [https://dashboard.dialect.to](https://dashboard.dialect.to)
2. **Click**: "Compose" tab
3. **You'll see**: "1 subscriber" (the user who just signed up)
4. **Write your message**:
* **Title**: "🎉 Welcome to My App!"
* **Body**: "This is your first notification from \[Your App Name]"
5. **Click**: "Send"
### Verify It Works
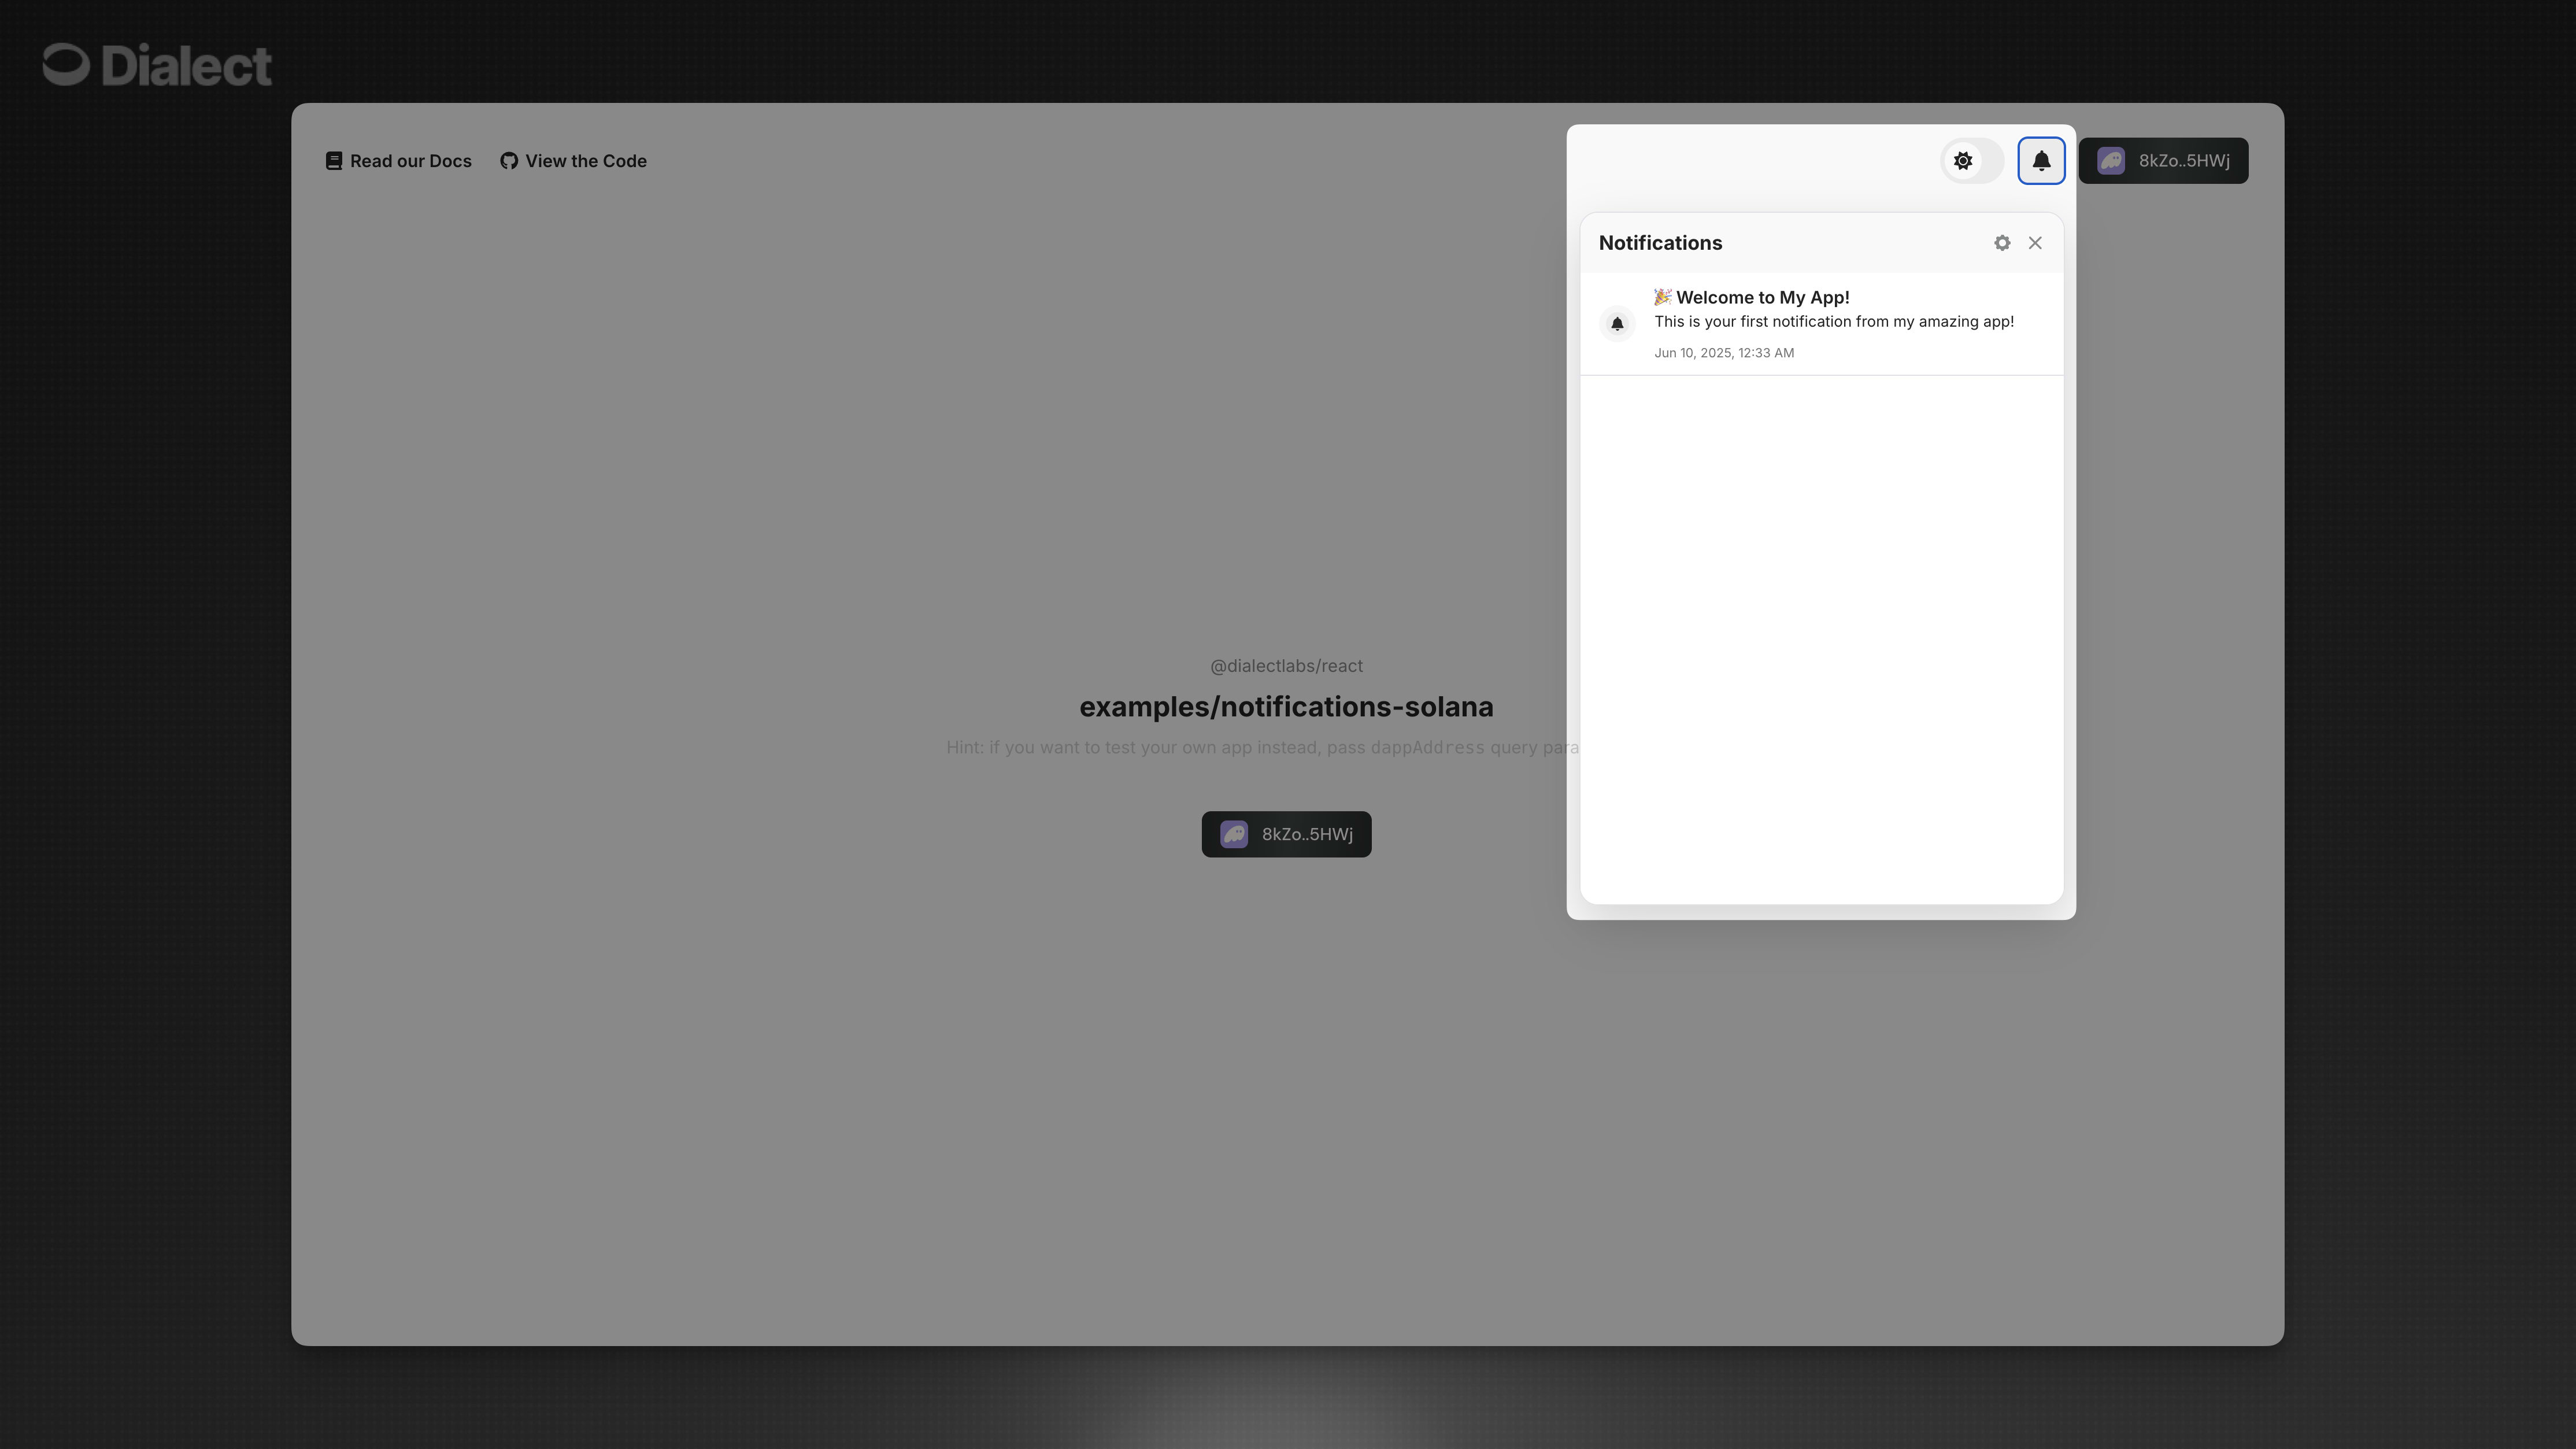 Go back to your app or our [Alerts Example App](https://alerts-example.dialect.to) and:
* The notification bell should show a green dot (unread notification)
* Click the bell to see your message: "Welcome to My App!"
* The message shows "This is your first notification..."
**🎉 Congratulations! You've sent your first notification!**
## Troubleshooting
### ❌ "No subscribers found"
* Make sure the user clicked the bell and enabled notifications
* **Very important**: Check that the toggle is "ON" in the notification settings (sometimes it defaults to "OFF")
### ❌ "Component not rendering"
* Ensure you imported the CSS: `import "@dialectlabs/react-ui/index.css"`
* Check that your app address is correct
* Verify wallet connection is working
### ❌ "User not receiving notifications"
* User must connect wallet and enable notifications first
* Check dashboard analytics to see delivery status
* Verify the target wallet address is correct
## Customization
Want to customize the look and feel of your notification bell? Check out our **[Event Detection and Monitoring](/alerts/alerts-and-monitoring/index)** guide where you can see how companies like Tensor have customized the notification widget to match their brand.
You'll find detailed styling options including:
* Custom colors and themes
* Component styling with CSS
* Complete customization examples
## Learn More
* **[Sending Guide](/alerts/send/index)** - Send alerts to your users either programmatic or by using or no-code Dashboard
* **[Universal Inbox Guide](/alerts/integrate-inbox/index)** - Integrate an Inbox using APIs or advanced UI components
* **[Event Detection and Monitoring](/alerts/alerts-and-monitoring/index)**: Use events to send notifications to your users
* **[API Guide](/api-reference/send-alerts/send-alert)** - Get an overview of available API endpoints
**🎉 You're all set!** You now have notifications working in your app. Your users can receive important updates directly in their wallets, and you can reach them programmatically from your backend.
Go back to your app or our [Alerts Example App](https://alerts-example.dialect.to) and:
* The notification bell should show a green dot (unread notification)
* Click the bell to see your message: "Welcome to My App!"
* The message shows "This is your first notification..."
**🎉 Congratulations! You've sent your first notification!**
## Troubleshooting
### ❌ "No subscribers found"
* Make sure the user clicked the bell and enabled notifications
* **Very important**: Check that the toggle is "ON" in the notification settings (sometimes it defaults to "OFF")
### ❌ "Component not rendering"
* Ensure you imported the CSS: `import "@dialectlabs/react-ui/index.css"`
* Check that your app address is correct
* Verify wallet connection is working
### ❌ "User not receiving notifications"
* User must connect wallet and enable notifications first
* Check dashboard analytics to see delivery status
* Verify the target wallet address is correct
## Customization
Want to customize the look and feel of your notification bell? Check out our **[Event Detection and Monitoring](/alerts/alerts-and-monitoring/index)** guide where you can see how companies like Tensor have customized the notification widget to match their brand.
You'll find detailed styling options including:
* Custom colors and themes
* Component styling with CSS
* Complete customization examples
## Learn More
* **[Sending Guide](/alerts/send/index)** - Send alerts to your users either programmatic or by using or no-code Dashboard
* **[Universal Inbox Guide](/alerts/integrate-inbox/index)** - Integrate an Inbox using APIs or advanced UI components
* **[Event Detection and Monitoring](/alerts/alerts-and-monitoring/index)**: Use events to send notifications to your users
* **[API Guide](/api-reference/send-alerts/send-alert)** - Get an overview of available API endpoints
**🎉 You're all set!** You now have notifications working in your app. Your users can receive important updates directly in their wallets, and you can reach them programmatically from your backend.